Free Pattern for a Cozy Cat Bed/Cube Cover
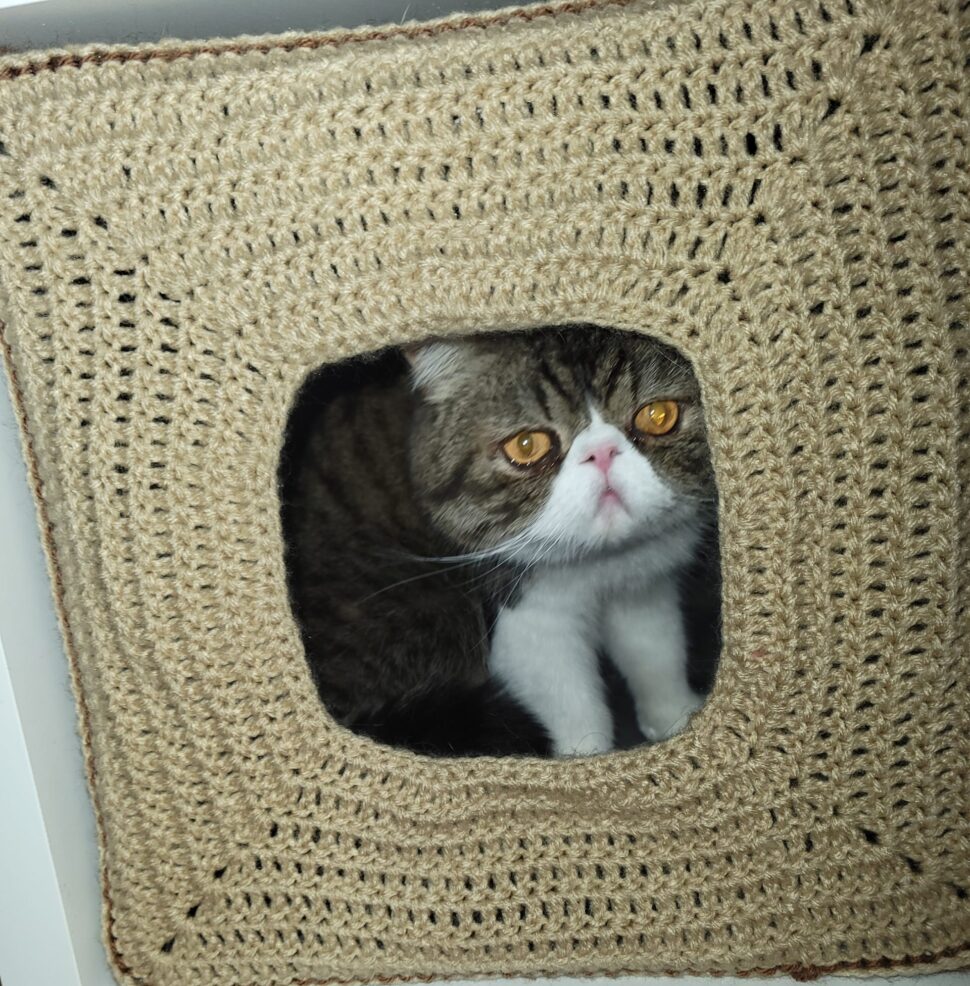
Here at Stately Wilson Manor, we share our house with seven cats. They come in all sizes and descriptions and they are like my children. With seven cats in residence, it sometimes becomes difficult for them to get some privacy. To remedy this problem, we have deployed what we refer to as a “cat sorter.” It’s really a simple six-cube storage unit bought from Target and a few of their cubes to go into them. We started by putting old t-shirts over the boxes with the neck hole as the opening. But there are always floppy sleeves to deal with and it can be hard to find the right sizes. The cubes on this unit are 13 inches square but you can adapt this pattern to fit other brands such as Ikea or the smaller 11 inch models. If you make this pattern, I would love to see pictures of your cute kitties in the boxes, so feel free to share.
Storage Cube Cover
Pattern is designed and written by Patricia Wilson.
Copyright ©2022 Patricia Wilson
This pattern remains the property of Patricia Wilson and is intended for personal use only. No unauthorized reproduction or distribution, in whole or in part, of this pattern or its content is allowed. Patterns are for your personal use only and not to be used to create items for commercial gain. All Patricia Wilson patterns are licensed for single use and remain the intellectual property of Patricia Wilson. This pattern may not be reproduced or transmitted, in whole or part, in any form or by any means, electronic, mechanical, photocopying, recording, or otherwise.
Thank you!
Materials
Suggested Materials: Any worsted weight yarn, acrylic works best.
Size H hook
Gauge: 4 stiches = 1 in, 2 rows DC = 1 in
Notes
This pattern is written in U.S./American terminology
Turning chains do not count as the first stitch in the next row.
For best results, you should always wash and block your work when it is finished.
From time to time, do a test fit. Your tension may be different from mine and the size of the block may vary slightly, even within the same brand.
To work a Shallow Front Post Stitch, yarn over, insert your hook from front to back beneath the top of the next stitch just as you would normally, then bring the hook around to insert the hook from back to front, around the post and under the top of the next stitch. Yarn over, draw up a loop, yarn over, draw through two loops, yarn over, draw through two loops again to complete the stitch.
Abbreviations
CH Chain
ST Stitch
SC Single Crochet
SL Slip Stitch
SFPS Shallow Front Post Stitch
Pattern
Ch 70. Join with a slip stitch to form a circle.
Row 1: SC in first 5 CH, 2SC in next chain, repeat around. SC in last 4 CH. Join to first SC. CH 2. 81 ST
Row 2: DC in first 6 ST. 2 DC in next ST. Repeat around. DC in last 4 ST. Join to first DC. CH 2. 92 ST
Row 3: DC in 22 ST. 3 DC in next ST. Repeat 3 more times. Join to first DC. CH 2. 100 ST
Row 4: DC in next 23 ST. 3 DC in next ST. DC in next 24 ST. 3 DC in next ST. Repeat from * twice more. DC in last ST. Join to first DC. CH 2. 108 ST
Row 5: DC in next 24 ST. (2 DC, CH 1, 2 DC) in next ST. DC in next 26 ST. (2 DC, CH 1, 2 DC) in next ST. Repeat from * twice more. DC in last 2 ST. Join to first DC. CH 2. You should now have 120 DC with 4 CH-1 SP for a total of 124 ST.
Row 6: DC in next 26 ST. (2 DC, CH 1, 2 DC) in next ST. DC in next 30 ST. (2 DC, CH 1, 2 DC) in next ST. Repeat from * twice more. DC in last 4 ST. Join to first DC. CH 2. You should now have 136 DC with 4 CH-1 SP for a total of 140 ST.
Row 7: DC in next 28 ST. (2 DC, CH 1, 2 DC) in next ST. DC in next 34 ST. (2 DC, CH 1, 2 DC) in next ST. Repeat from * twice more. DC in last 6 ST. Join to first DC. CH 2. You should now have 152 DC with 4 CH-1 SP for a total of 156 ST.
Row 8: DC in next 30 ST. (2 DC, CH 1, 2 DC) in next ST. DC in next 38 ST. (2 DC, CH 1, 2 DC) in next ST. Repeat from * twice more. DC in last 8 ST. Join to first DC. CH 2. You should now have 168 DC with 4 CH-1 SP for a total of 172 ST. At this point, check to make sure your square is large enough. It should not reach all the way to the edges of the cube because it will stretch and you want the next part to fit snuggly around the cube without collapsing it.
Row 9: Work 1 Shallow Front Post Stitch around each post of the previous row. 172 ST.
Row 10: Work one DC in each stitch around. 172 ST.
Repeat row 10 until the piece fits over the box and covers it all the way down to the bottom. Tie off and enjoy!
Blessings,
Trish


Leave a Reply